Recently more and more hosters have started to offer IPv6-only virtual private servers (VPSs) that give you your own dedicated server at a major discount:
- TransIP - SandboxVPS – €2,50/month (ex. VAT)
- v6Node.com – €9/year - recently featured on Hacker News
- Hetzner – disable IPv4 for a server and start from €3,62/month
- PCextreme – €1,00/month
- Possibly a lot more, see for some examples the HN thread linked above.
If you have not been blessed with IPv6 connectivity at home, that might look pretty useless. How do you connect to the server to manage it with SSH? How do you actually connect to the web application you want to host? Luckily there is a way around this by using Cloudflare Tunnel and SSH Access.
Choosing the right server
The easiest way to get Cloudflare Tunnel installed is by using a distribution and version for which Cloudflare releases pre-built packages of Cloudflare Tunnel (aka cloudflared). An up-to-date complete list can be found on the package repository.
You can also pick any other distribution and take care of the installation of the cloudflared executable yourself as described on the GitHub page: cloudflare/cloudflared.
Cloudflare Tunnel
Open the Cloudflare Zero Trust dashboard, navigate to Access > Tunnels and click Create New Tunnel.
You can pick a name and will then get to the following screen where you can copy paste the command to install the cloudflared package based on your OS:
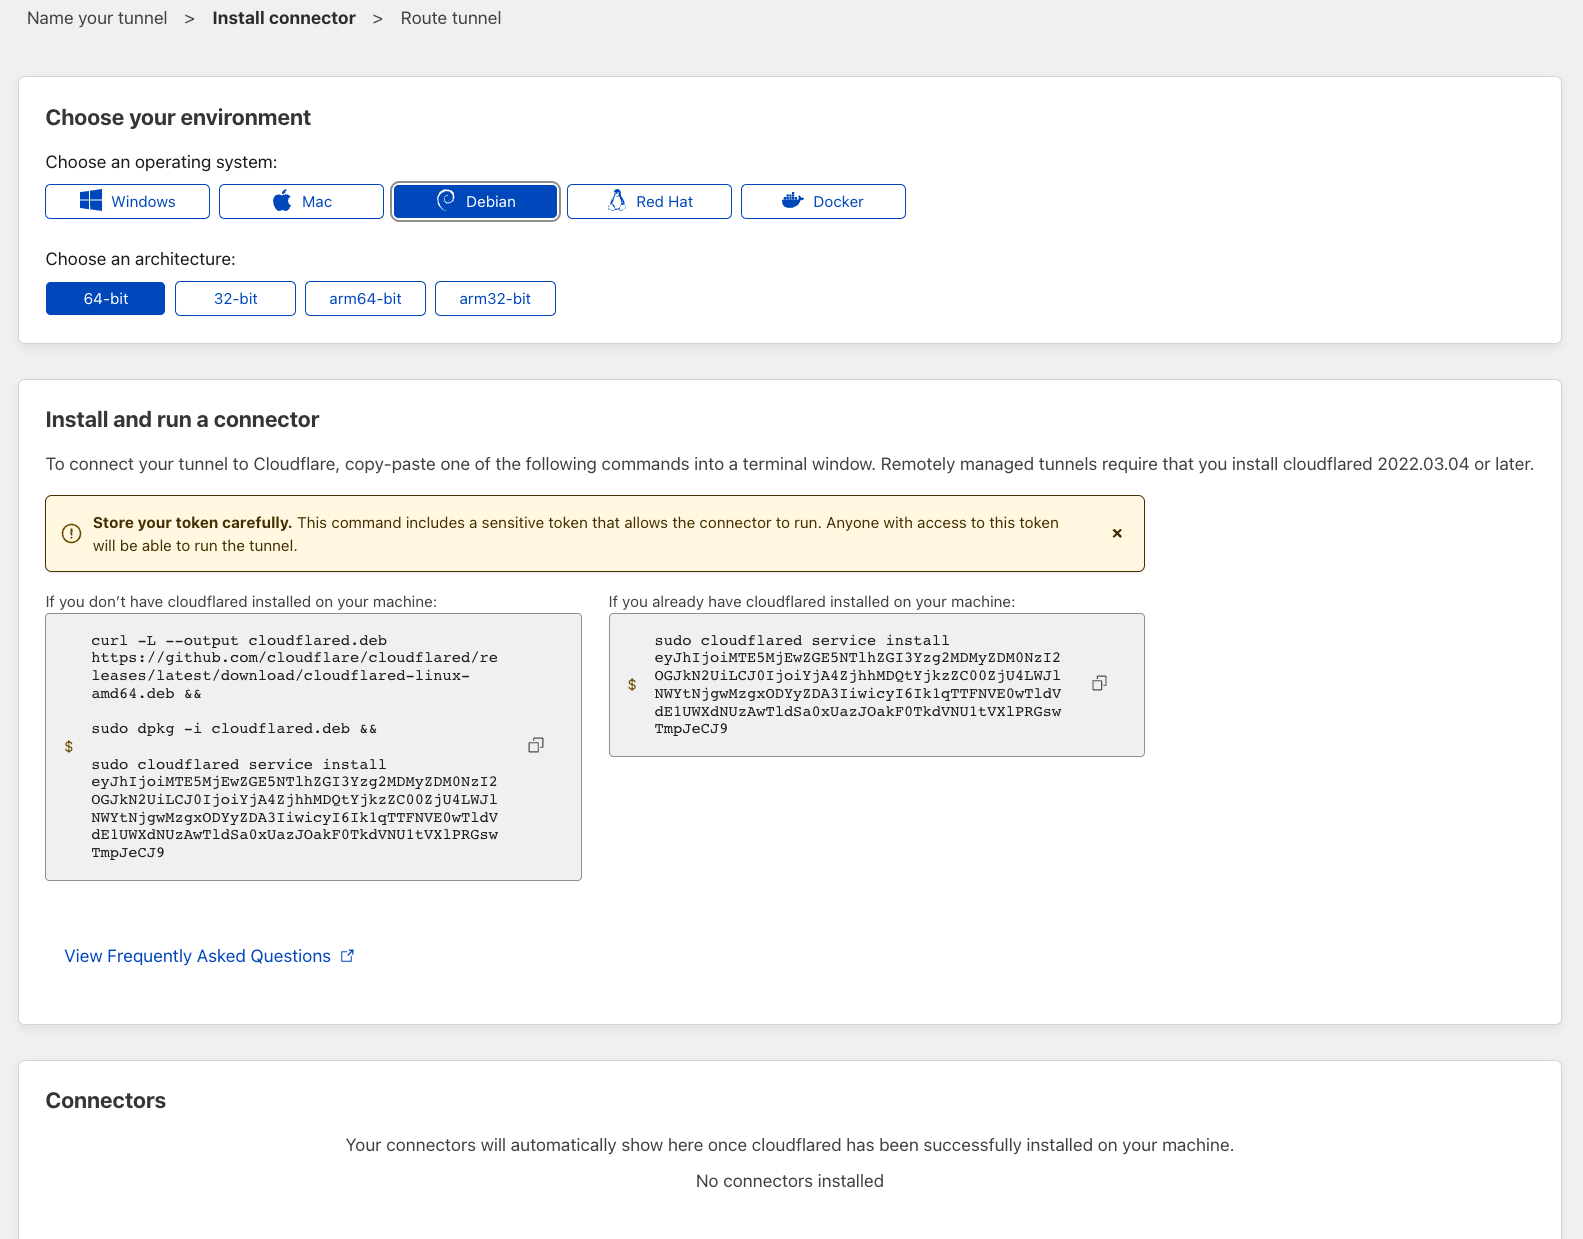
Connecting the connector
The bottom part of the screen will auto-refresh to show you any connectors that have been found to connect to Cloudflare, but this probably won’t happen yet.
To get the connector to connect to Cloudflare using IPv6-only, we need to change the way the service is started. For this change the systemd unit file located at /etc/systemd/system/cloudflared.service to include the --edge-ip-version 6 option in the ExecStart command. It should look something like this:
[Unit]
Description=cloudflared
After=network.target

[Service]
TimeoutStartSec=0
Type=notify
ExecStart=/usr/bin/cloudflared --edge-ip-version 6 --no-autoupdate tunnel run --token xxxxx
Restart=on-failure
RestartSec=5s

[Install]
WantedBy=multi-user.target
Restart the service and you should be seeing a connection pop up in the Cloudflare Zero Trust dashboard. Click Next.
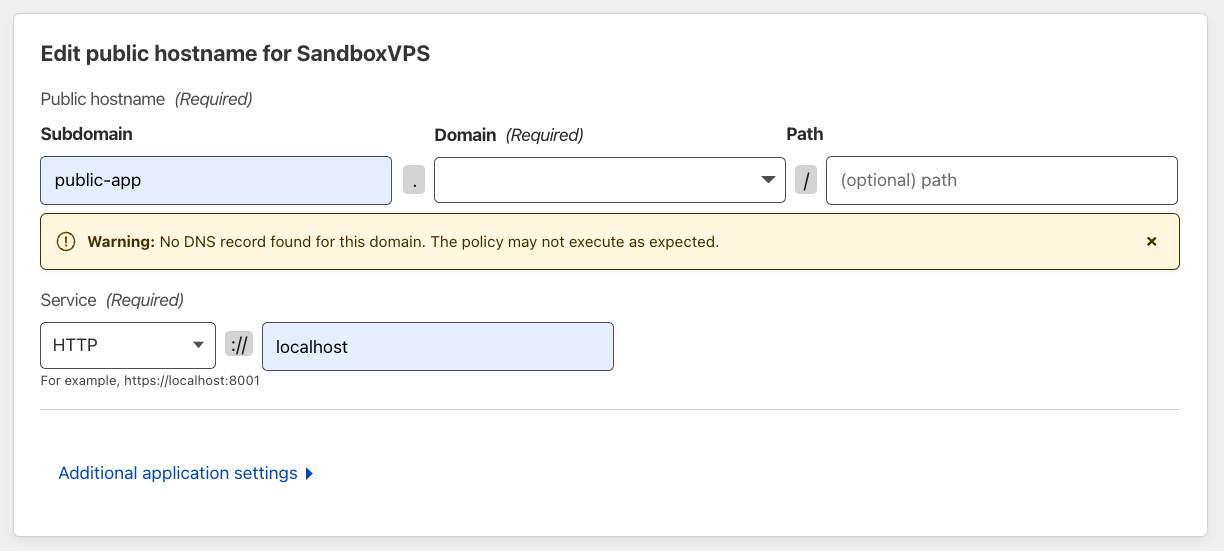
Add an SSH Service
On the next screen you will configure a Public Hostname for the SSH server that’s running on the server. Simply choose a hostname as part of your Cloudflare domain and point it to SSH on the localhost:
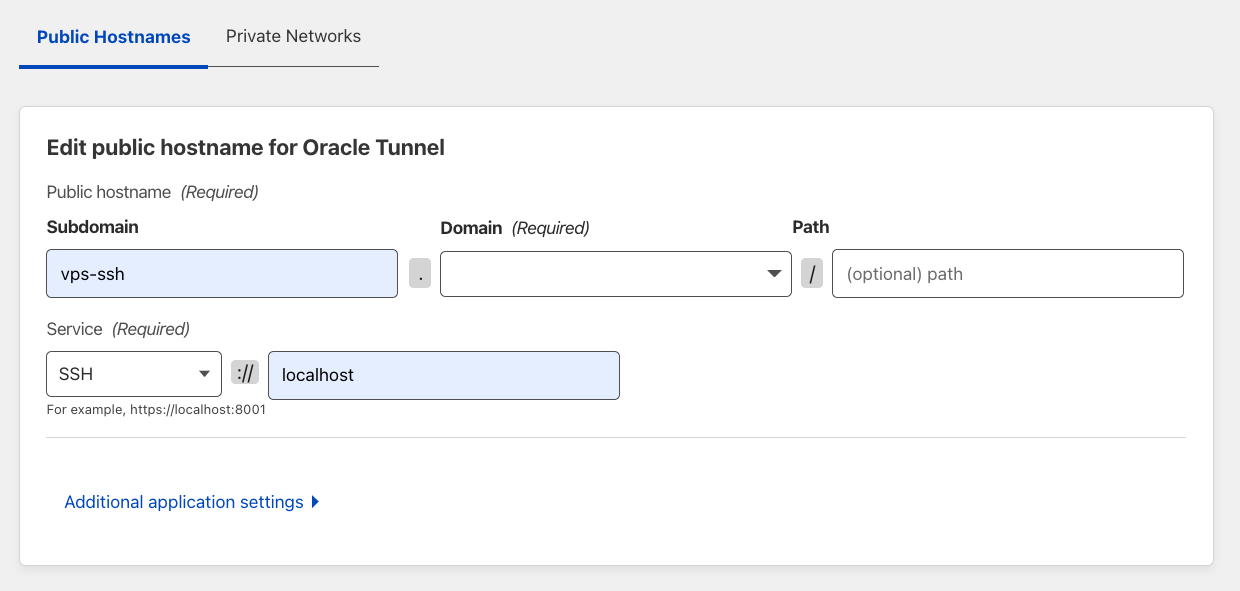
Set a public hostname for the SSH application
That’s it! Finish the configuration for the Tunnel by clicking Save.
Protect the SSH Application
Now head over to the Access > Applications screen to add a new ‘Self-hosted’ application for your vps-ssh.example.com public hostname:
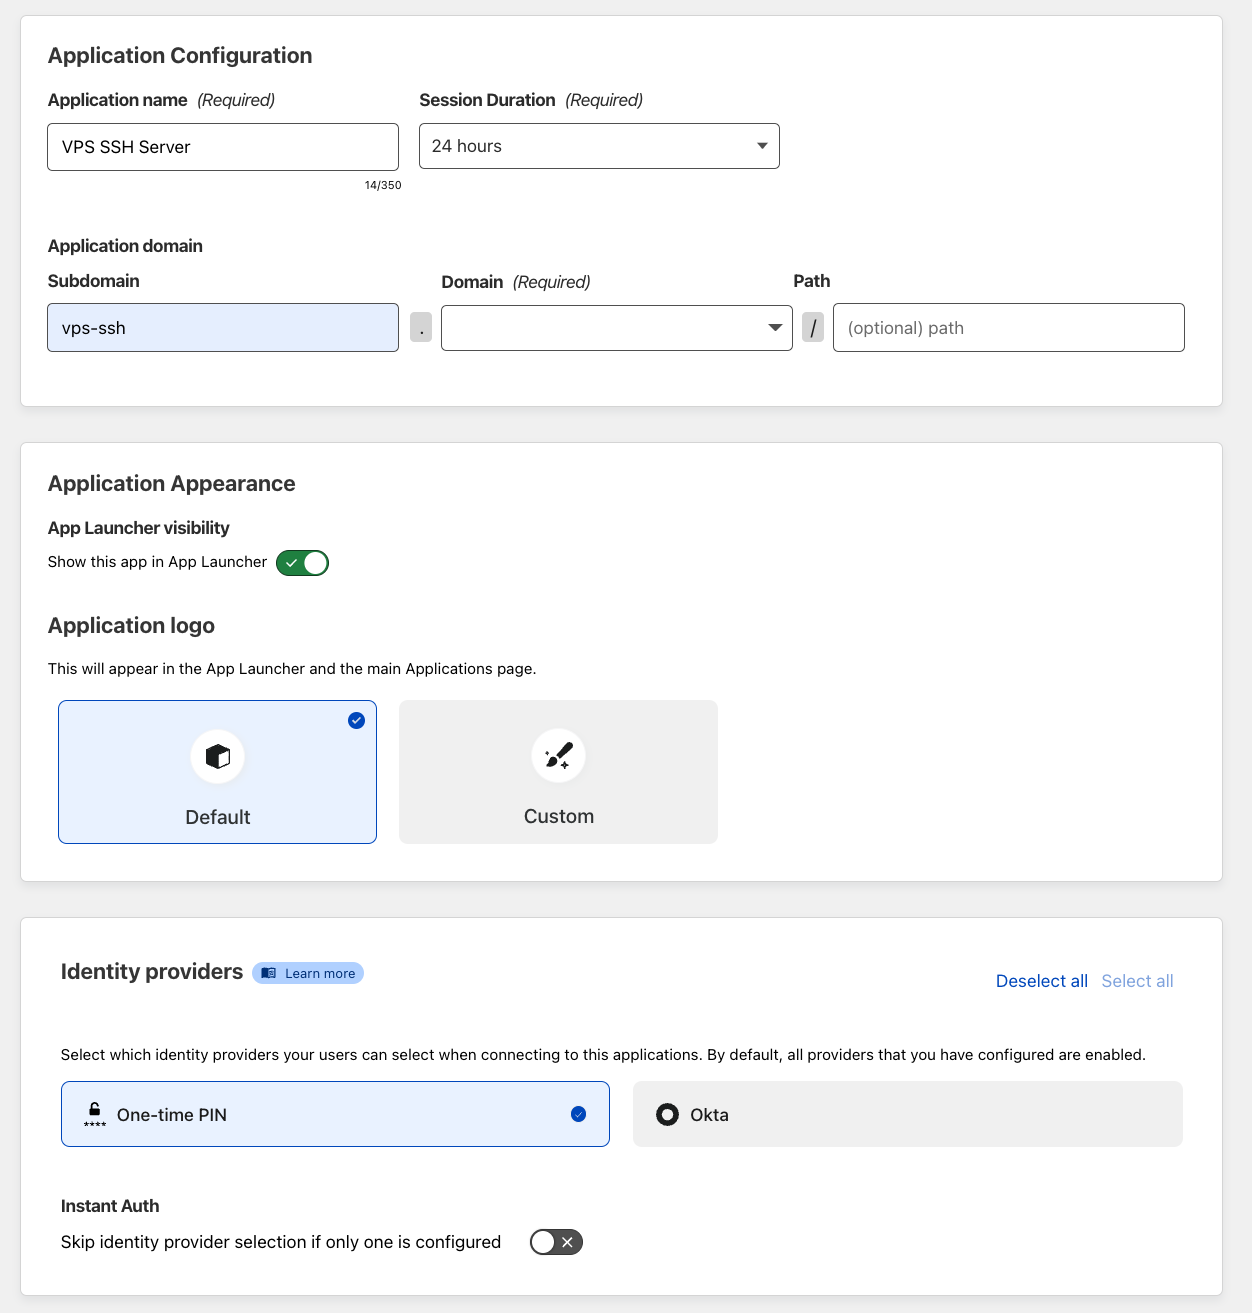
Setup an Access Application to protect the SSH service
In the Identity providers section you can always choose One-time PIN or get Okta onboarded first (did you know they have a free Developer sign-up?). This will take care of the authentication of the users.
Next you will have to define the authorization for the application. For example, you want to limit access only to certain email addresses or members of specific Okta groups:
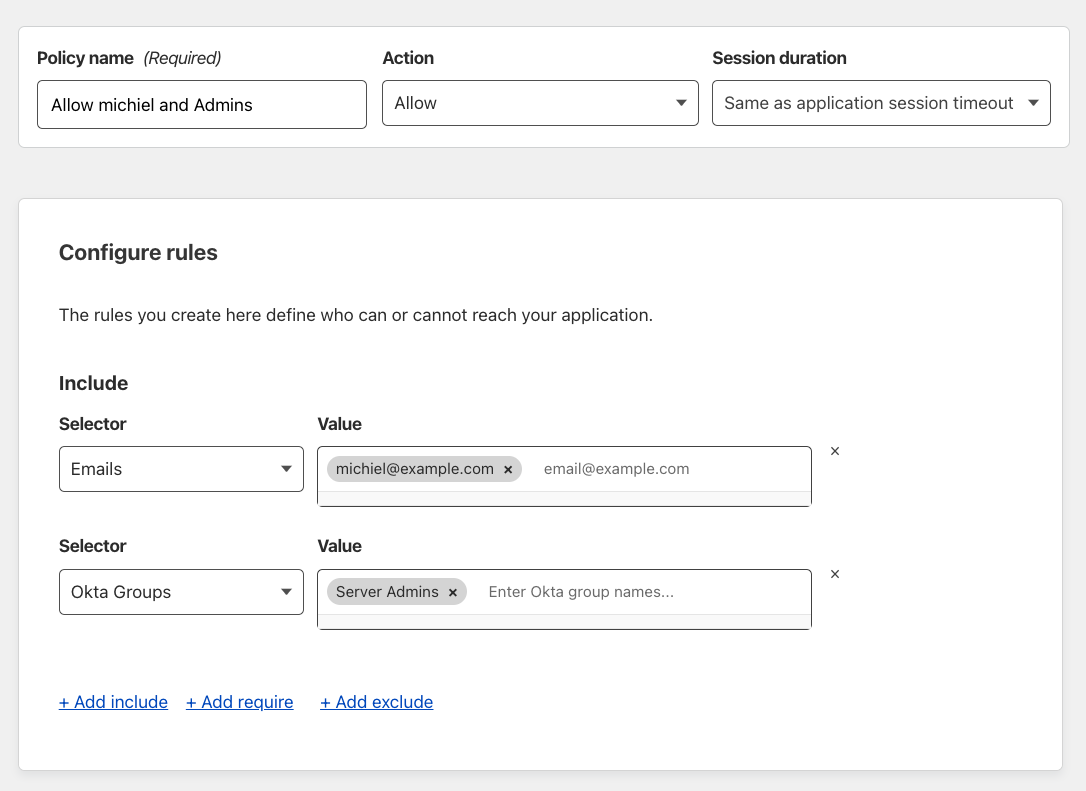
Configure an authentication policy
And finally on the next screen you can scroll down and enable browser-rendering for the SSH session so that you can connect without any terminal.
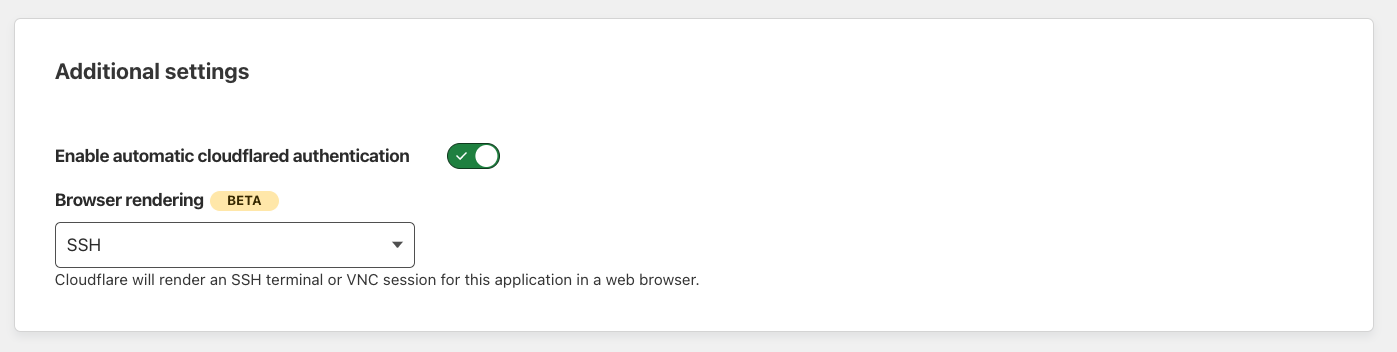
Enable browser rendering
Connect from a terminal
Connecting through a browser can be nice a last-resort, but most times an actual terminal is much more comfortable. Based on the Cloudflare docs we can now try to connect to the just configured SSH application through a terminal.
First install cloudflared on your local machine, eg. with brew:
brew install cloudflare/cloudflare/cloudflared
Second, edit your ~/.ssh/config file to include a Host for your new VPS SSH application with a special proxy command:
Host vps
  Hostname vps-ssh.example.com
  ProxyCommand /opt/homebrew/bin/cloudflared access ssh --hostname %h
Also be sure to include the right IdentityFiles that your VPS expecting, and you should be good to go! Running ssh vps should now open a browser window where you should be able to authenticate and then be redirected back to your terminal.
With all of that setup, you now have your own webserver available through Cloudflare, reachable over IPv4 and IPv6, but just connected to IPv6. When you’re ready to add your first web applications, go back into the Access > Tunnels > VPS Tunnel configuration and add a new Public Hostname that points to the port on localhost where the application is running. Have fun!
Create a new public hostname for the HTTP application
Further Reading
- Connect another application: https://developers.cloudflare.com/cloudflare-one/connections/connect-apps/install-and-setup/tunnel-guide/#2-connect-an-application
- Protecting your web applications: https://developers.cloudflare.com/cloudflare-one/applications/configure-apps/self-hosted-apps/
- An old but golden tutorial of Cloudflare’s CTO: SSHing to my Raspberry Pi 400 from a browser, with Cloudflare Tunnel and Auditable Terminal