I’m not sure what typing level you were when you started your career. Still, I think it is safe to say that I was not at a level that prepared me for working life primarily spent at a keyboard. Even more so, of course, when the pandemic hit.
What I mean by that is that I could not touch-type. Well, not with more than two fingers, because that is what I taught myself over the years without any formal training. So when the pandemic was in full swing, I decided to make the most of my time spent behind said keyboard and teach myself proper typing using the Colemak layout. I did not settle on Colemak immediately, though, and if you’re on the fence about it, I will take you through my journey.
What to learn?
Since I taught myself some poor man’s touch typing on regular QWERTY keyboards, I knew I would have to unlearn some elaborate muscle memory. At the same time, I knew QWERTY was not the only layout and that it definitely did not become a de facto standard because of its ergonomics. So I decided that since I started from scratch anyway, I would choose the appropriate layout for my needs. I have to warn you, though: you can (and probably will) get lost in a very deep rathole of keyboard layouts, with one of the layouts having amassed an even more passionate following than the other.
If you’re even half-serious about choosing a new layout, you will end up on carpalx, where you will read up on stroke paths, hand alternations, triads, and much more. Those values combined for all the different layouts result in a particular score that makes one of the layouts the best (QFMLWY) and another the worst (no, that’s not QWERTY, but TNWMLC, an anti-optimized layout with its own fashion line). Then you learn that the guy behind carpalx also collaborated on an article on the Dutch journalistic website De Correspondent to find the best Dutch layout. And you (or at least I, since I am Dutch) start to throw that in the comparison.
I will not judge you if, by this time, you have built an Excel with a dozen or so layouts, their total efforts for different languages, etc. Probably also around this time, perhaps instigated by that very Excel, you will have a momentary flashback of a kiss. Or, on second thought, a KISS – Keep It Simple, Stupid! You realize that you have started to optimize prematurely, which, according to scholars, is where evil lives.
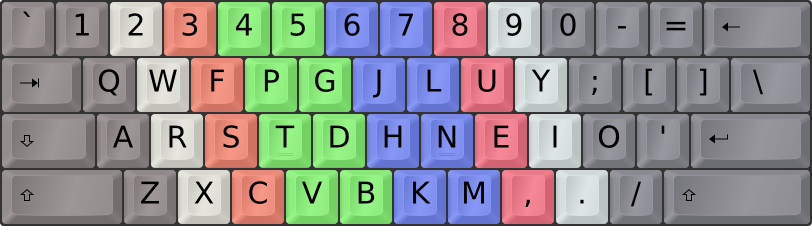
Colemak layout
At this point, I made a quick decision to start with Colemak. It already is a massive improvement over QWERTY and also:
- Leaves a lot of punctuation keys in the exact location – great for coding
- It is quite popular and therefore supported quite well on various touch-type learning tools
- It is supported out-of-the-box by macOS and iPadOS – this makes it super easy to switch to and from
- Apparently also isn’t too bad for Dutch!
How to learn?
There is, of course, only one trick to learning anything, and that is repetition. I made an effort to practice for at least 15 minutes every day. Those 15 minutes turned out to be a bit of a minimum, but also a maximum: practising any longer would negatively affect my accuracy increase my frustration, resulting in even lower accuracy. keybr.com keeps a nice log of your lessons:
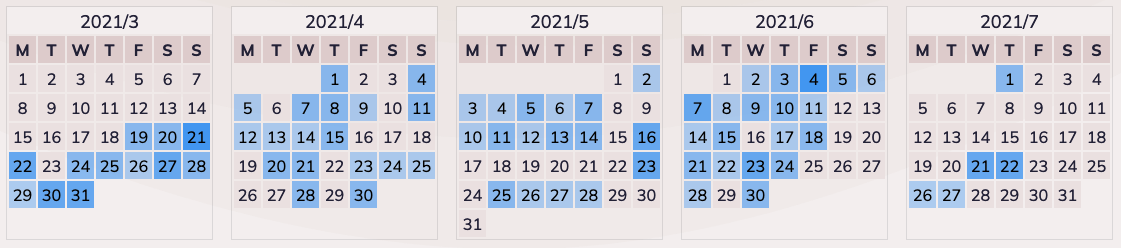
Typing learing calendar
You see here that I kept at it for a couple of weeks and was practising a lot less after about four months. The good news is that by that time, I felt confident enough to switch to Colemak full-time! Practising as I went with business email, chat, etc. Everything was now done without looking at the keyboard and using all my fingers.
I do have to admit that I am not a fast typer. After a year of typing with Colemak, my top words-per-minute is 44. You can see progress in the graph below, but it’s not stellar by any measure. But honestly, I’m OK with that: it still feels great to type so effortlessly.
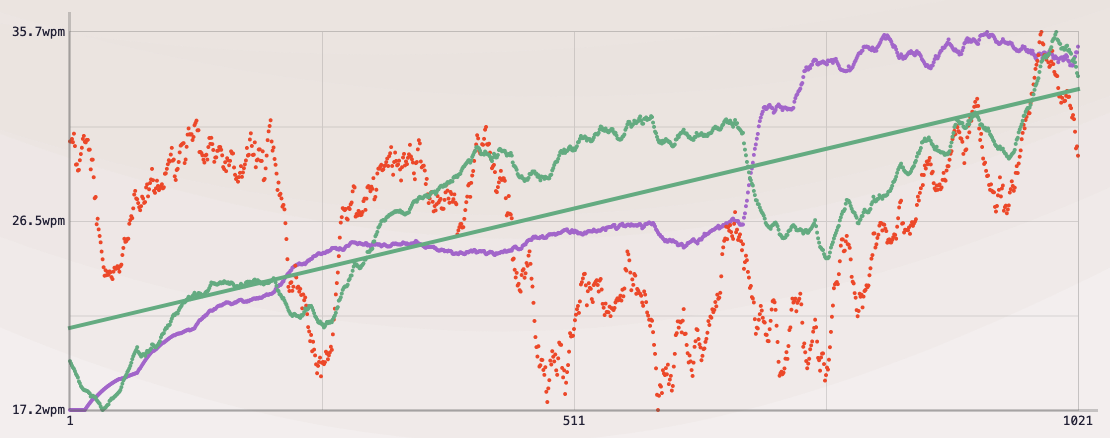
Typing speed increase. Green is speed, red is accuracy, and purple is the number of letters.
Regarding tools, I initially started with GNU Typist but later switched to keybr.com mentioned earlier. The great thing about it is that you can set the Colemak layout to be emulated instead of changing input sources on your OS. This allows you to quickly get some practice. The way it teaches you is excellent but brutal: it will focus on a couple of keys initially and let you practice until it measures that you are comfortable with them. Then it adds new keys to the mix, coming back every time to a specific key when it measures you’re losing confidence in it.
Whatever tool you decide to use, a typical recommendation is to use one that scores you primarily based on accuracy and then speed. As I have found out, your speed increase will be limited if you’re not accurate enough. Because, yeah, no matter how fast you can press backspace, that doesn’t count towards your WPM.
Remapping h/j/k/l
When you have taken the plunge, have spent some hours on keybr.com and are reasonably comfortable with the new layout, there will come a time when you run into challenges. For me, that was in the way to navigate in Vim/Neovim using h/j/k/l. Colemak moves the last three of those keys to different positions on the keyboard that are not intuitive at all. One easy solution is to use the arrow keys on your keyboard instead of h/j/k/l and forget about it. However, I grew pretty accustomed to the location of those keys, as they are in a great position on the home-row.
Then I remembered the concept of a layer on a keyboard that allows you to configure keys to act in a different way when you’re holding down a particular key. The Shift key can be seen as a modifier that activates the Capitals and Punctuation layer. And of course, there are the Ctrl, Alt and Cmd keys. Those seemed too far from the home row, and I chose to use the Escape key as a modifier to emulate arrow-key presses when the h/j/k/l keys are pressed.
To remap these keys, you will need to use Karabiner Elements. With it, you can first do a simple modification to map Caps Lock to Escape (you didn’t think I would be using the regular Escape key, did you!?):
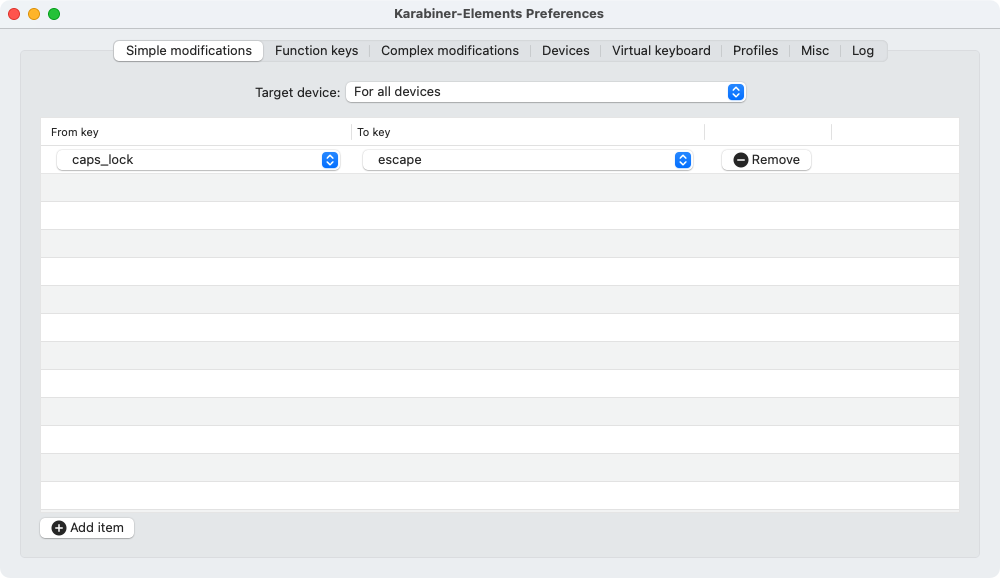
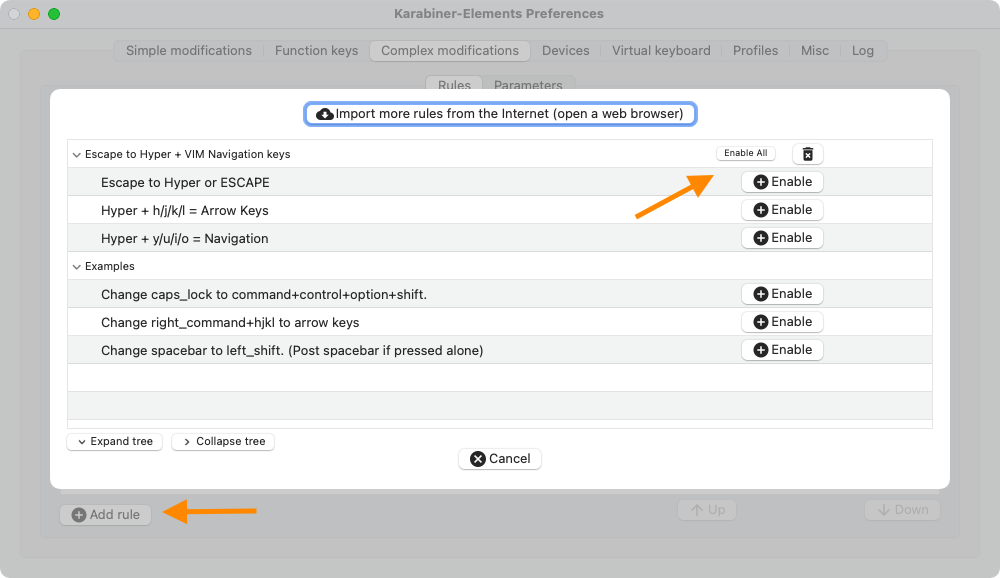
Then the tricky part comes where we need to add some complex modifications. My config is available in my dotfiles repo and does a couple of things:
- Map Escape to Shift+Ctrl+Cmd+Option (also known as a Hyper-key), but only when held down: when there is a single press, the key will act as a regular Escape key.
- Map Hyper + h/j/k/l to Left/Down/Up/Right keys
- Map Hyper + y/u/i/o to Home/PgDwn/PgUp/End keys
Just to give you an idea, the first remap looks like this:
"manipulators": [
  { "from": {
      "key_code": "escape",
      "modifiers": {"optional": [ "any" ]}
    },
    "to": [
      {"key_code": "left_shift",
       "modifiers": ["left_control", "left_command", "left_option"]}
    ],
    "to_if_alone": [{"key_code": "escape"}],
    "type": "basic"
}]
If you want to use this remap config, download it from my repository and put it in the ~/.config/karabiner/assets/complex_modifications/ folder. The three remap configurations listed above can then be chosen in the Karabiner settings:
I’ve really come to enjoy this configuration for Vim, but the best thing is that I can now use the same Vim-like keys to navigate everywhere on my system: browsing in Firefox, writing in Word and calculating in Excel. Give it a try, and let me know what you think on Twitter!